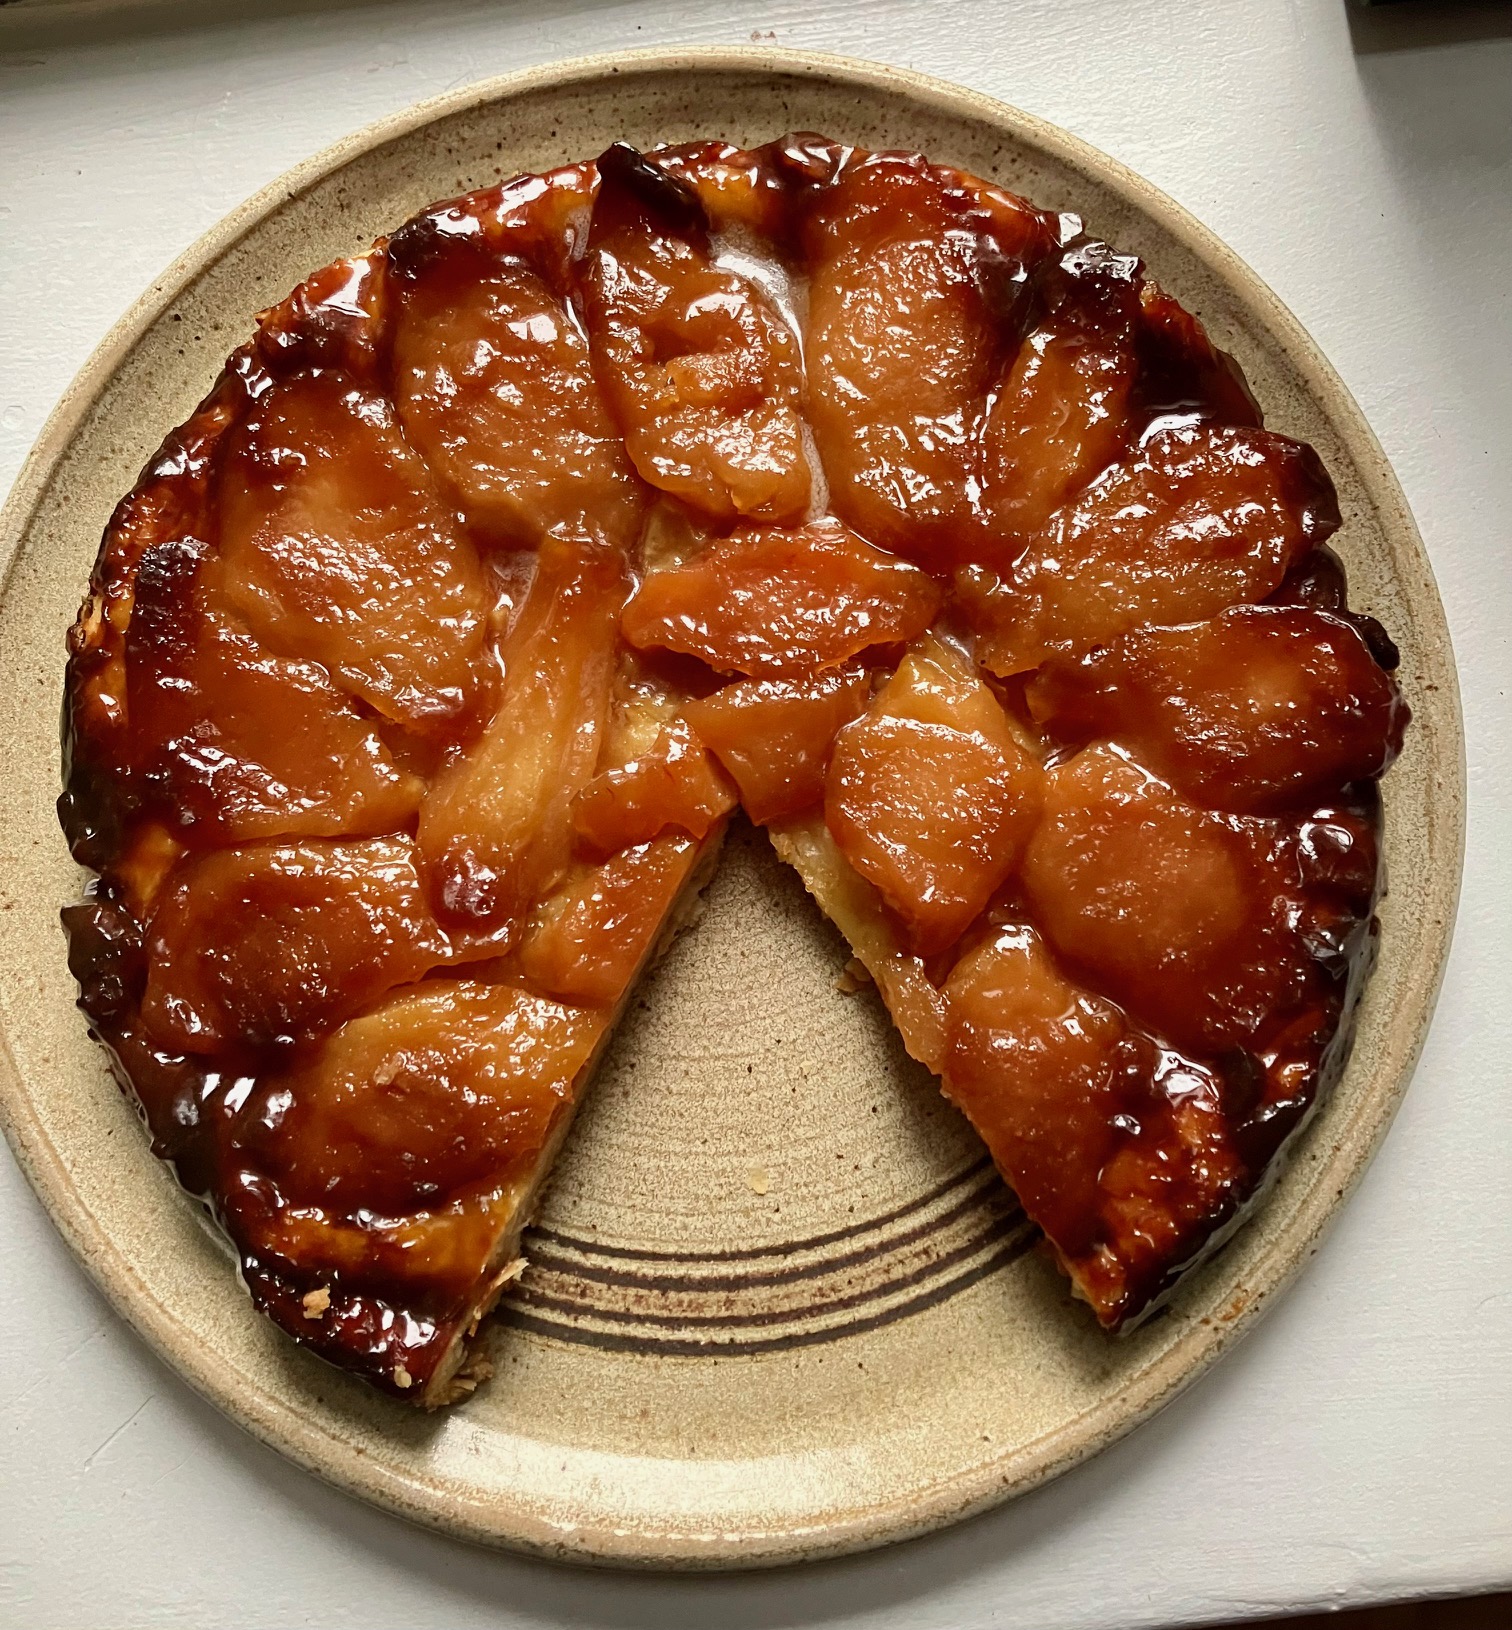
‘Tis officially cozy season, which also means prime baking season! This miso pear tarte tatin is the perfect prelude to your fall baking list, highlighting seasonal pears with a warming miso maple caramel and none other than a flaky, buttery crust. This tarte tatin spends quite some time cooking on the stove prior to journeying to the oven and in that time, the fruity caramel fills your home with the most comforting and cozy scent.
While this tart requires very few ingredients, I did make some careful choices to design the perfect pear tarte tatin recipe.
- Make a shortcrust pastry: Tarte tatin is often, although not always, made with puff pastry, which is light and flaky. Puff pastry is a bit more labor intensive to make and has a tendency to go soggy quickly. I wanted a tarte tatin crust that was still delectably flaky but could better stand up to the moisture from the fruit and the caramel, maintaining a nice crispness even on day two and three. The pie crust recipe I used, adapted from Claire Saffitz’s Dessert Person, held up beautifully and came together in just a few minutes.
- Add maple syrup and miso to the caramel: To make this recipe a little bit more fall-forward, I added maple syrup to the caramel, which provides some of that extra warmth and nostalgic flavor. The savory miso cuts the sweetness of the caramel and adds more complexity to the flavor–it isn’t obviously detectable, just adds a satisfying saltiness to balance the sweetness. And to round it all out, a tad bit of apple cider vinegar to brighten the caramel flavor and counteract the saltiness of the miso.
- Precook the pears on the stovetop: When I was researching this recipe, I discovered that the internet has very strong feelings about the best method for cooking a tarte tatin. The takeaway for me is that once fruit starts to cook, it releases a good amount of moisture, so if you want to make sure your tarte tatin isn’t too runny or soggy and maintains a concentrated caramel flavor, you need to cook out much of that moisture before topping it with the pie crust. It also helps to ensure that the fruit cooks all the way through. The trickiness with pears is that they are much more tender than apples and cook through before the liquid has a chance to reduce sufficiently. To solve for this, I added the pears to the caramel and cooked on each side for about five minutes, to allow the pears to soften and release their juices, without getting mushy. Using a spatula or slotted spoon, I then removed the pears and let the caramel continue to simmer until it had thickened. This also allowed the pears to cool down–a crucial step before adding the dough–so it was a win-win.
The take home message here is that I probably spent too much time researching tarte tatin. But, the result is fantastic–the pears are perfectly tender but still hold their shape, the caramel has just the right amount of sweetness, and the dough is perfectly crisp with not a single hint of sogginess. Light your fall candles, find yourself some pears, and carve out a crisp afternoon or evening to craft your perfect tarte tatin.
Miso pear tarte tatin
Course: Pies and tartsDifficulty: Baking session1
8-inch tart45
minutes45
minutesThis miso pear tarte tatin has a deeply comforting maple miso caramel which generously coats the fresh pears and sits atop a perfectly crisp, flaky pastry. The sweetness of the caramel is balanced by the salty miso and a hint of apple cider vinegar, with the maple adding an extra dose of fall flavor.
Ingredients
- For the crust
1 1/2 cups (188g) all-purpose flour
1 Tbsp granulated sugar
1/2 tsp kosher salt
8 Tbsp unsalted butter, cold
5-6 Tbsp ice water
- For the topping
4 -5 ripe but firm pears (bosc, bartlett or anjou)
1/4 cup maple syrup
1/2 cup (100g) granulated sugar
4 Tbsp unsalted butter
1 1/2 Tbsp sweet saikyo miso or other white miso
2 tsp apple cider vinegar
1 tsp vanilla extract
Instructions
- Prepare the crust
- In a medium bowl, stir together the flour, sugar, and salt. Cut half of the butter into cubes and very thinly slice the other half. Add to the flour mixture and use your hands to toss the butter to coat it in flour. Then, smoosh each of the butter pieces with your hands to help flatten them and break them apart until you have a mix of pea-sized pieces and pieces that are slightly larger.
- Add in five tablespoons of ice water and mix together with a fork. Then use your hands to compress the dough a couple of times and push it together until it forms a ball. If there are dry patches that won’t come together sprinkle just a little bit more water over the dry spots and then add them to the dough ball. Flatten the dough into a disk, wrap in plastic wrap and refrigerate for at least 30 minutes and up to overnight.
- For a flakier crust, after refrigerating for at least 30 minutes, take the crust out for about 10 minutes to soften some and lightly roll into a narrow rectangle, fold into thirds–folding each of the short ends toward the center. Wrap again and refrigerate until ready to use.
- Make the topping
- Peel, core, and quarter the pears. Remove the dough from the fridge and set aside. Then, in a heavy-bottomed, oven-and stove-proof 8″ skillet or pan add the granulated sugar and maple syrup. Cook over medium low heat, stirring occasionally until the sugar has dissolved. The maple syrup will bubble up a lot as it caramelizes, so continue stirring every 20 seconds or so for about 5-7 minutes, until the mixture is emitting a bit of smoke, the bubbles go from lots of quick tiny bubbles to some larger, slower bubbles, and the mixture smells like a nice toasty caramel. If the sugar crystallizes, you can salvage the mixture by stirring in a few tablespoons of water and stirring vigorously to redissolve the sugar.
- Once the caramel is ready, remove from the heat and stir in the 4 tablespoons of butter, one tablespoon at a time, stirring to dissolve. Then stir in the miso, apple cider vinegar, and vanilla until well-combined. Add the pears to the caramel, arranging in a tightly packed outer circle and adding additional pieces to fill the center. You’ll make the final arrangement later, but this will help you determine if you have enough pear quarters to tightly pack the pan.
- Return to medium low heat and simmer for five minutes. Flip each pear quarter and simmer for another five minutes, or until the pears have softened some and released their juices. While the pears are cooking, roll out the pie dough on a floured piece of parchment or silicone mat until it is slightly larger than the size of the pan. Cover with plastic wrap and transfer to the fridge until ready to use. Letting the dough relax after rolling will ensure it doesn’t shrink in the oven.
- When the pears are ready, gently remove them using a slotted spoon or spatula, and place on a plate temporarily. Continue to reduce the caramel mixture until most of the excess liquid from the pears has evaporated and the mixture is somewhat viscous, with larger, slower bubbles. If you run your spatula or spoon through the caramel, it should take a moment before the gap is filled again. If it fills instantly, it needs more time.
- Remove from the heat and let cool for a few minutes. Preheat the oven to 400F. When it feels safe enough to do so, transfer the pears back onto the caramel, placing the pitted side face up toward you. Again arrange in a tight outer circle, and neatly arrange the remaining pieces in the middle. Once the oven has preheated, remove the dough from the fridge. Prick with a fork throughout. Then place on top of the pears, tucking the crust in around the sides.
- Bake for approximately 45 minutes or until golden brown. Let cool for 30 minutes, so the caramel has time to set. Run a knife around the edge and invert onto a plate. If the caramel has hardened too much to invert, simply place back on the stove over medium low heat just enough to melt the caramel that is stuck to the bottom–if you run your knife around the edges, you should feel when the caramel has started to loosen. Then try again to flip. You may have a few pear pieces that stick to the pan–you can easily rearrange those on top. Serve warm.
- Leftovers can be stored lightly covered in plastic wrap at room temperature.




Leave a comment